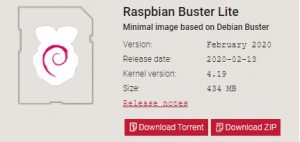
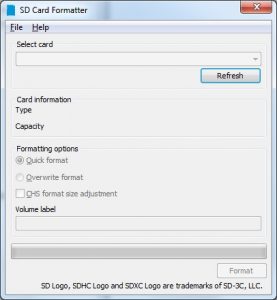
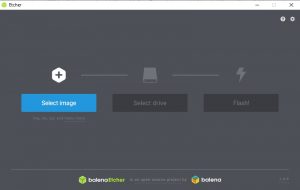
Copy to boot drive on SD card. note:if copied image, just change ssid, psk above, then find ip address.
The SD card is ready to be installed in your Raspberry PI board. Install the camera ribbon cable into the camera slot. Insert new SD card and apply power.
When the Pi powers up, it will obtain an IP address automatically from your router.
You will want to know what this IP is: Log into router and reserve ip address to mac address.
Enable the camera and set the timezone: $ sudo raspi-config under network options – change hostname to picam1 (or the next camera #) under interfacing options – enable camera, enable SSH under Localisation options – time zone: America/New York keybd=us $ reboot
$ sudo apt-get install git $ cd /home/pi $ git clone https://github.com/billw2/pikrellcam.git $ cd pikrellcam $ ./install-pikrellcam.sh default port: 80 auto boot: yes password: your pi password
Camera Software Configuration:
Startup Motion enable= on Preview motion Clean = on Check Media Diskfree = on Check Archive Diskfree = on video fps = 25 Video/Still Res = 1920 x 1080 Set up motion regions on web Make changes to pikrellcam config file (in hidden directory .pikrrellcam) $ cd /home/pi/.pikrellcam $ sudo nano pikrellcam.conf To disable the red LED you simply need to add the following line to your config.txt file : $ sudo nano /boot/config.txt Use the arrow keys to scroll to the end of the file and add “disable_camera_led=1” to the last line. Press “CTRL-x” to quit. If prompted press “Y” followed by “Return” or “Enter”.
Install Samba: (Session Message Block, Common Internet File System)
you can share directories from your Raspberry Pi using the SMB/CIFS protocols. Allows Linux computers to integrate into Microsoft’s active directory environments seamlessly. CIFS or Common Internet File System is an implementation of the SMB protocol. In modern setups, CIFs or SMB is used interchangeably, but most people will use the term SMB. $ sudo apt-get install samba samba-common-bin we need to first create a folder that we will share. $ mkdir /home/pi/shared Now we can share this folder using the Samba software. To do this, we need to modify the samba config file. The “smb.conf” configuration file is where you will store all your settings for your shares. We can begin modifying the config file by running the command below. $ sudo nano /etc/samba/smb.conf Within this file, add the following to the bottom. This text defines various details of our share. [picam1-directory you choose] (front yard camewra) path = /home/pi/pikrellcam/media/videos writeable=Yes create mask=0777 directory mask=0777 public=yes “[picam1-directory you choose]” – This defines the share itself, the text between the brackets is the point at which you will access the share.
For example, ours will be at the following address: //picam1/picam1-your directory Next, we need to set up a user for our Samba share on the Raspberry Pi. Without it, we won’t be able to make a connection to the shared network drive. $ sudo smbpasswd -a pi password = pi password note: If you would like to ensure that Windows users are automatically authenticated to your Samba share, without prompting for a username/password, all that’s needed is to add the samba user and password exactly as you Windows clients usernames and password. When a Windows system accesses a Samba share, it will automatically try to log in using the same credentials as the user logged into the Windows system. On windows PC: map network drive <\\picam1\picam1-dir or \\raspberry pi or ip address\picam1-dir> Connect using different user – user: pi , pw: pi password Restart Sumba:
$ sudo systemctl restart smbd
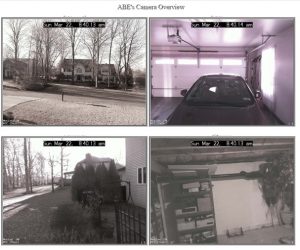
Add camera web site: Just paste into text file and name it index.html. Also change the ip addresses and remove camera 1,2,3,4 comments.<html> <head> <title>Abe’s Camera Overview</title> <script src=”js-css/jquery.min.js”></script> <script src=”js-css/loader.js”></script> <link rel=”stylesheet” href=”js-css/pikrellcam.css” /> </head> <body background=”images/paper1.png”> <div class=”text-center text-shadow-large”>ABE’s Camera Overview</div> <div id=”camera-container”> <div class=”camera”>192.168.0.100</div> camera 1 <div class=”camera”>192.168.0.101</div> camera 2 <div class=”camera”>192.168.0.102</div> camera 3 <div class=”camera”>192.168.0.103</div> camera 4 </div> <!– Camera container div –> </body> </html>